Android Training/Running Your Application
Wenn Du der vorherigen Lektion zur Erstellung eines Android-Projektes gefolgt bist, erhält es einige Standard-Hello World-Quellcode-Dateien die Dir erlauben deine App sofort zu starten.
Wie Du deine App ausführst hängt von zwei Dingen ab: ob Du ein echtes Android-Gerät hast und ob Du Eclipse benutzt. Diese Lektion zeigt Dir wie Du Deine App auf einem echten Gerät und im Android Emulator installierst und ausführst, in beiden Fällen jeweils mit Eclipse und Kommandozeilenwerkzeugen.
Bevor Du Deine App startest solltest Du ein paar Verzeichnisse und Dateien in dem Android-Projekt kennen:
AndroidManifest.xml- Diese Manifest-Datei beschreibt die grundlegenden Charakteristiken der App und definiert jede ihrer Komponenten. Du wirst verschiedene Deklarationen in dieser Datei lernen wenn du weitere Lektionen liest.
src/- Verzeichnis für die Haupt-Quellcode-Dateien deiner App. Standardmäßig enthält es eine
Activityklasse welche ausgeführt wird wenn deine App über das App-Icon gestartet wird. res/- Enthält einige Unterverzeichnisse für App-Ressourcen. Hier sind ein paar:
drawable-hdpi/- Verzeichnis für Grafikobjekte (wie Bitmaps) die für Displays mit hoher Pixeldichte gestaltet wurden. Andere Grafikverzeichnisse enthalten Dateien die für andere Pixeldichten gestaltet sind.
layout/- Verzeichnis für Dateien welche die Benutzeroberfläche Deiner App beschreiben.
values/- Directory for other various XML files that contain a collection of resources, such as string and color definitions.
When you build and run the default Android project, the default Activity class in the src/ directory starts and loads a layout file from the layout/ directory, which includes a "Hello World" message. Not real exciting, but it's important that you understand how to build and run your app before adding real functionality to the app.
Run on a Real Device
Whether you’re using Eclipse or the command line, you need to:
- Plug in your Android-powered device to your machine with a USB cable. If you’re developing on Windows, you might need to install the appropriate USB driver for your device. For help installing drivers, see the OEM USB Drivers document.
- Ensure that USB debugging is enabled in the device Settings (open Settings and navitage to Applications > Development on most devices, or select Developer options on Android 4.0 and higher).
To run the app from Eclipse, open one of your project's files and click Run from the toolbar. Eclipse installs the app on your connected device and starts it.
Or to run your app from a command line:
- Change directories to the root of your Android project and execute:
ant debug
- Make sure the Android SDK
platform-tools/directory is included in yourPATHenvironment variable, then execute:adb install bin/MyFirstApp-debug.apk
- On your device, locate MyFirstActivity and open it.
To start adding stuff to the app, continue to the next lesson.
Run on the Emulator
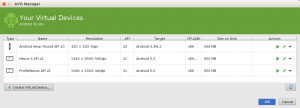
Whether you’re using Eclipse or the command line, you need to first create an Android Virtual Device (AVD). An AVD is a device configuration for the Android emulator that allows you to model different device configurations.

To create an AVD:
- Launch the Android Virtual Device Manager:
- In Eclipse, select Window > AVD Manager, or click the AVD Manager icon in the Eclipse toolbar.
- From the command line, change directories to
<sdk>/tools/and execute:./android avd
- In the Android Virtual Device Device Manager panel, click New.
- Fill in the details for the AVD. Give it a name, a platform target, an SD card size, and a skin (HVGA is default).
- Click Create AVD.
- Select the new AVD from the Android Virtual Device Manager and click Start.
- After the emulator boots up, unlock the emulator screen.
To run the app from Eclipse, open one of your project's files and click Run from the toolbar. Eclipse installs the app on your AVD and starts it.
Or to run your app from the command line:
- Change directories to the root of your Android project and execute:
ant debug
- Make sure the Android SDK
platform-tools/directory is included in yourPATHenvironment variable, then execute:adb install bin/MyFirstApp-debug.apk
- On the emulator, locate MyFirstActivity and open it.
To start adding stuff to the app, continue to the next lesson.
<translate> Portions of this page are modifications based on work created and shared by the Android Open Source Project and used according to terms described in the Creative Commons 2.5 Attribution License.</translate>
