Android Training/Running Your Application
If you followed the previous lesson to create an Android project, it includes a default set of "Hello World" source files that allow you to run the app right away.
How you run your app depends on two things: whether you have a real Android-powered device and whether you’re using Eclipse. This lesson shows you how to install and run your app on a real device and on the Android emulator, and in both cases with either Eclipse or the command line tools.
Before you run your app, you should be aware of a few directories and files in the Android project:
AndroidManifest.xml- This manifest file describes the fundamental characteristics of the app and defines each of its components. You'll learn about various declarations in this file as you read more training classes.
src/- Directory for your app's main source files. By default, it includes an
Activityclass that runs when your app is launched using the app icon. res/- Contains several sub-directories for app resources. Here are just a few:
drawable-hdpi/- Directory for drawable objects (such as bitmaps) that are designed for high-density (hdpi) screens. Other drawable directories contain assets designed for other screen densities.
layout/- Directory for files that define your app's user interface.
values/- Directory for other various XML files that contain a collection of resources, such as string and color definitions.
When you build and run the default Android project, the default Activity class in the src/ directory starts and loads a layout file from the layout/ directory, which includes a "Hello World" message. Not real exciting, but it's important that you understand how to build and run your app before adding real functionality to the app.
Auf einem echten Gerät starten
Unabhängig, ob du Eclipse oder die Kommandozeile verwendest, musst du vor dem Start:
- Dein Android Gerät per USB mit dem Computer verbinden. Wenn du unter Windows entwickelst, musst du den entsprechenden USB-Treiber für das Gerät installieren. Hilfe zur Installieren der Treiber findest du hier: OEM USB Drivers.
- Sicherstellen das USB-Debugging auf dem Gerät aktiviert ist. Gehe hierzu in die Einstellungen deines Gerätes und navigiere zu Einstellungen->Entwickler-Optinen und setze einen Hacken bei USB-Debugging.
Um die App von Eclipse auszuführen, musst du eine Datei deines Projektes öffnen und in der Symbolleiste auf Run klicken. Eclipse installiert die App auf dem angeschlossenen Gerät und startet sie.
Wenn du statt Eclipse die Kommandozeile verwendest, führe folgende Schritte aus:
- Wechsle in das Stammverzeichnis von deinem Android Projekt und führe
ant debug
aus - Stelle sicher dass das Android-SDK /plattform-tools-Verzeichnis in deinen PATH-Umgebungsvariablen enthalten ist, und führe
adb install bin/MyFirstApp-debug.apk
aus - Suche auf deinem Gerät nun die App MyFirstActivity und starte sie
Weiter geht es mit dem Nächsten Schritt.
Run on the Emulator
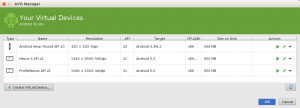
Whether you’re using Eclipse or the command line, you need to first create an Android Virtual Device (AVD). An AVD is a device configuration for the Android emulator that allows you to model different device configurations.

To create an AVD:
- Launch the Android Virtual Device Manager:
- In Eclipse, select Window > AVD Manager, or click the AVD Manager icon in the Eclipse toolbar.
- From the command line, change directories to
<sdk>/tools/and execute:./android avd
- In the Android Virtual Device Device Manager panel, click New.
- Fill in the details for the AVD. Give it a name, a platform target, an SD card size, and a skin (HVGA is default).
- Click Create AVD.
- Select the new AVD from the Android Virtual Device Manager and click Start.
- After the emulator boots up, unlock the emulator screen.
To run the app from Eclipse, open one of your project's files and click Run from the toolbar. Eclipse installs the app on your AVD and starts it.
Or to run your app from the command line:
- Change directories to the root of your Android project and execute:
ant debug
- Make sure the Android SDK
platform-tools/directory is included in yourPATHenvironment variable, then execute:adb install bin/MyFirstApp-debug.apk
- On the emulator, locate MyFirstActivity and open it.
To start adding stuff to the app, continue to the next lesson.
<translate> Portions of this page are modifications based on work created and shared by the Android Open Source Project and used according to terms described in the Creative Commons 2.5 Attribution License.</translate>
